4. Infer Drug Distributions #
Let’s now explore a path illuminated by our newfound understanding of vascular network morphology, enhanced by the power of Gaussian Process (GP) Modelling, to uncover the biological relevance of vessel arrangement. As you know, any drug reaches it’s target through vessels, but how exactly do vessel morphology and distribution impact the diffusion of compounds from the vessels into surrounding tissues? To answer, we must correlate the vascular network extracted from histological images with MALDI imaging data through GP modelling. Your aim is to model the spatial distribution of a drug within a tissue sample based on MALDI imaging, where pixel intensity is directly proportional to drug concentration. However, before applying GP modelling to real images, we must validate the model’s accuracy through simulations.
Theoretical Background: A Gaussian Process (GP) is a collection of random variables, where any finite subset follows a multivariate normal distribution. This statistical method offers a probabilistic framework for modelling spatial dependencies. It is widely used in spatial statistics and machine learning to infer continuous functions from discrete data points. In this context, GP modelling allows us to estimate the underlying drug distribution function based on observed MALDI intensities.
-
4.1 Generating synthetic vessel images #
To begin, execute
Final_optimized_4_Windows.R(script downloadable from the user slrenne’s erivessel repository). Note that this code only works on windows operating systems.As usual, set up your environment. Notably, set a fixed seed for random number generation and import the
Statistical Rethinkingpackage (detailed intructions for installation may be found on Richard McElreath’s rethinking repository). We also create a parallel cluster to speed things up.#r set.seed(20241028) library(rethinking) library(parallel) library(plot.matrix) library(viridis) library(MASS) num_cores <- detectCores() - 1 cl <- makeCluster(num_cores)We start by simulating binary vessel masks as square matrices, where pixels with value
1represent vessel regions and0represent any non-vascular tissue.#r test_function <- function(n, circles) { mat <- matrix(0, nrow = n, ncol = n) for(i in 1:n) { for(j in 1:n) { for(circle in circles) { center <- circle$center radius <- circle$radius if (sqrt((i - center[1])^2 + (j - center[2])^2) <= radius) { mat[i, j] <- 1 } } } } return(mat) }Here, you may manually set the number of images and matrix size to obtain your desired trade-off between accuraccuracy and computational cost. In this case we are generating
10masks each having a20x20grid with circular vessel regions. The vessel positions and radii are randomly sampled to introduce variability.#r N_img <- 10 # Number of synthetic images n <- 20 # Matrix dimensions circles_list <- vector("list", N_img) for(i in 1:N_img) { circles_list[[i]] <- list( list(center = c(sample(5:15, 1), sample(5:15, 1)), radius = runif(1, 1, 3)), list(center = c(sample(5:15, 1), sample(5:15, 1)), radius = runif(1, 1, 3)) ) }We generate vessel masks in parallel using the defined
test_function().#r clusterExport(cl, c("test_function", "n", "circles_list")) mats <- parLapply(cl, 1:N_img, function(i) test_function(n, circles_list[[i]])) -
4.2 Creating Simulated MALDI Images #
Next, we generate simulated MALDI intensity maps based on any predefined function you like, such as an exponential decay model:
$$ I(x) = \eta^2 e^{- \frac{d(x)^2}{2\rho^2}} $$
where we manually define the parameters:
- $d(x)$: the Euclidean distance from vessels
- $\eta^2$: the signal variance
- $\rho$: the characteristic length scale controlling spatial correlation
First, compute Euclidean distance matrices for each image in parallel.
#r
grids <- parLapply(cl, 1:N_img, function(i) expand.grid(X = 1:n, Y = 1:n))
Dmats <- parLapply(cl, 1:N_img, function(i) as.matrix(dist(grids[[i]], method = "euclidean")))
Then, as previously mentioned, define the the kernel function parameters.
#r
beta <- 5
etasq <- 2
rho <- sqrt(0.5)
Compute covariance matrices using the radial basis function (RBF) kernel.
#r
clusterExport(cl, c("beta", "etasq", "rho", "Dmats"))
Ks <- parLapply(cl, 1:N_img, function(i) {
  etasq * exp(-0.5 * ((Dmats[[i]] / rho)^2)) + diag(1e-9, n*n)
})
Now, sample synthetic MALDI intensities using a GP prior.
#r
clusterExport(cl, "Ks")

sim_gp <- parLapply(cl, 1:N_img, function(i) {
  MASS::mvrnorm(1, mu = rep(0, n*n), Sigma = Ks[[i]])
})
Generate observed intensity values by adding noise.
#r clusterExport(cl, c("sim_gp")) sim_y <- parLapply(cl, 1:N_img, function(i) { rnorm(n*n, mean = sim_gp[[i]] + beta * as.vector(t(mats[[i]])), sd = 1) }) -
4.3 Inferring drug distribution with GP regression #
Now that we have simulated data, we fit a Gaussian Process model using Bayesian inference with Stan (rethinking package).
First, prepare data for the Bayesian model.
#r
dat_list <- list(N = n*n)
for(i in 1:N_img) {
  dat_list[[ paste0("y", i) ]] <- sim_y[[i]]
  dat_list[[ paste0("x", i) ]] <- as.vector(t(mats[[i]]))
  dat_list[[ paste0("Dmat", i) ]] <- Dmats[[i]]
}
Next, define the GP model.
#r
model_code <- "alist(\n"
for(i in 1:N_img) {
  model_code <- paste0(model_code,
                       "  y", i, " ~ multi_normal(mu", i, ", K", i, "),\n",
                       "  mu", i, " <- a + b * x", i, ",\n",
                       "  matrix[N, N]:K", i, " <- etasq * exp(-0.5 * square(Dmat", i, " / rho)) + diag_matrix(rep_vector(0.01, N)),\n")
}
model_code <- paste0(model_code,
                     "  a ~ normal(0, 1),\n",
                     "  b ~ normal(0, 0.5),\n",
                     "  etasq ~ exponential(2),\n",
                     "  rho ~ exponential(0.5)\n",
                     ")")

model_list <- eval(parse(text = model_code))
Fit the GP model using Hamiltonian Monte Carlo (HMC) via the
ulamfunction from the rethinking package. This approach enables Bayesian inference on vessel spatial organization and drug distribution. Feel free to play around with the following parameters according to your computational resources.chainssets how many independent MCMC chains are run to ensure proper convergence.coressets how many CPU cores are used to parallelize computation and speed up sampling.itersets how manu iterations are run per chain, including warm-up.warmupsets how many iterations are used for warm-up (not included in posterior estimates).
#r
GP_N <- ulam(model_list, data = dat_list, chains = 4, cores = num_cores, iter = 600, warmup = 150)
Finally, print the model summary.
#r print(precis(GP_N)) post <- extract.samples(GP_N) -
4.4 Validating the Model #
We visualize the inferred vs. true covariance functions by plotting the priors, the actual kernel and the estimated kernels (your posterior samples). Also, remember to stop the cluster to free resources.
#r
set.seed(08062002)

p.etasq <- rexp(n, rate = 0.5)
p.rhosq <- rexp(n, rate = 0.5)

plot(NULL, xlim = c(0, max(Dmats[[1]])/3), ylim = c(0, 10),
     xlab = "pixel distance", ylab = "covariance",
     main = "Prior, Actual, and Estimated Kernel")

# Priors
for(i in 1:20)
  curve(p.etasq[i] * exp(-0.5 * (x/p.rhosq[i])^2),
        add = TRUE, lwd = 6, col = col.alpha(2, 0.5))

# Actual kernel
curve(etasq * exp(-0.5 * (x/rho)^2), add = TRUE, lwd = 4)

# Estimated kernels
for(i in 1:20) {
  curve(post$etasq[i] * exp(-0.5 * (x/post$rho[i])^2),
        add = TRUE, col = col.alpha(4, 0.3), lwd = 6)
}
stopCluster(cl)
If the inferred decay function closely matches the predefined function, it means the GP model accurately recovers known distribution parameters. So, the model’s acccuracy is validated and ready to be easily applied to real world histological and MALDI images!
-
4.5 Spatial Flattening Methods #
In many spatial modeling tasks, intensity maps must be transformed from two-dimensional grids into one-dimensional vectors before they can be processed by standard statistical or machine learning pipelines. However, this flattening step risks disrupting spatial continuity, which can degrade the model’s ability to recover meaningful spatial structure, especially in biological data such as MALDI imaging.
To investigate this, we simulate synthetic MALDI intensity maps with varying degrees of spatial correlation and compare two flattening strategies: the conventional row-major vectorization and the Hilbert curve traversal, a space-filling curve known for preserving locality. Our aim is to determine which method better maintains spatial relationships, as measured by the closeness of slope estimates $\hat{\beta}$ to the ideal value of 1. In particular, we focus on whether Hilbert curve traversal can more accurately recover the spatial alignment between signal intensity (e.g., MALDI peaks) and known spatial structures (e.g., vessels).
The accompanying code,
HILBERT_RECOVER_PYTHON.ipynb, available in the erivessel repository by the user slrenne, implements this analysis pipeline. To benchmark performance, we define five synthetic groups that span a range of spatial signal strengths. These groups serve as controlled test cases for comparing the fidelity of the two flattening strategies in preserving spatial structure.To simulate a realistic range of spatial correlations in MALDI data, the five experimental groups are
RandomNoise,VeryWeak,Weak,Medium, andHigh. Each group is associated with a distinct combination of Gaussian Process (GP) parameters that control the degree of spatial smoothness and strength of signal present in the intensity maps. The parameters used include:etasq: the variance of the GP kernel, which governs how smooth or structured the spatial field is (0 for random noise, higher values for smoother fields).rho: the characteristic length scale that determines how quickly spatial correlation decays with distance.beta: a scalar coefficient that amplifies the contribution of vessel presence to intensity values.sigma_eps: the level of observation noise added to the synthetic intensity values.
We fix the grid size to 25×25 and generate 50 replicate images per group, each using a fixed random seed for reproducibility. These parameters are stored in a Pandas DataFrame indexed by group name for easy lookup later during simulation.
#python
import numpy as np
import pandas as pd
import matplotlib.pyplot as plt
import seaborn as sns
from scipy.spatial.distance import pdist, squareform
from scipy.stats import linregress
import warnings

warnings.filterwarnings("ignore", category=UserWarning)

n = 25    # image dimension
num_images_per_group = 50  # replicates per group
np.random.seed(888)

group_names = ["RandomNoise", "VeryWeak", "Weak", "Medium", "High"]
gp_params_data = {
    'Group': group_names,
    'etasq': [0.00, 0.8, 0.8, 0.8, 0.8],
    'rho': [np.sqrt(0.5)] * 5,
    'beta': [0.001, 0.5, 2, 4, 10],
    'sigma_eps': [0.01] * 5
}
gp_params = pd.DataFrame(gp_params_data).set_index('Group')
To simulate realistic biological structure, we generate synthetic binary vessel masks that represent blood vessels in tissue. Each vessel mask is constructed on a 25×25 grid and consists of 2 to 3 randomly placed circular regions. These vessel regions are marked by pixels with a value of 1, while background pixels remain at 0. The radius of each vessel is also randomized between 2 and 3 pixels, providing variability across replicates and avoiding overly regular structures. This randomness is important because it ensures that the flattening methods will be tested on a diverse set of spatial configurations. The function
generate_random_vessel()uses meshgrids to compute Euclidean distances from randomly chosen centers, and fills in circular regions wherever the distance is less than or equal to the sampled radius. This vectorized approach is both efficient and geometrically accurate.#python min_circles = 2 max_circles = 3 min_radius = 2 max_radius = 3 grid_size = int(2**np.ceil(np.log2(n))) n_points = n * n def generate_random_vessel(n, min_circ, max_circ, min_r, max_r): mat = np.zeros((n, n)) n_circles = np.random.randint(min_circ, max_circ + 1) y_coords, x_coords = np.meshgrid(np.arange(n), np.arange(n)) for _ in range(n_circles): cx = np.random.randint(max_r, n - max_r) cy = np.random.randint(max_r, n - max_r) r = np.random.randint(min_r, max_r + 1) distance = np.sqrt((x_coords - cx)**2 + (y_coords - cy)**2) mat[distance <= r] = 1 return matWith the vessel masks defined, the next step is to simulate MALDI-like intensity maps whose spatial distribution is influenced by the presence of vessels. This is done using a Gaussian Process (GP) model, a common statistical tool for generating spatially correlated data.
Each pixel in the image is assigned an intensity value based on a GP prior. If the
etasqparameter is zero, we simulate pure random noise using a normal distribution. Otherwise, we construct a full covariance matrix K using a squared exponential (RBF) kernel, which ensures that nearby pixels are more strongly correlated than distant ones. The spatial structure is further shaped byrho, which controls the spatial scale of correlation.We add a linear term (
beta * x_vec) to incorporate the contribution of the binary vessel mask, so that pixels near vessels exhibit higher intensity. Observation noise (sigma_eps) is added along the diagonal of the covariance matrix to mimic measurement uncertainty.The resulting simulated values are reshaped back into a 2D grid and normalized to a range between 0 and 5, providing a consistent dynamic range for downstream comparisons.
#python

#boh
def compute_distance_map(v):
    vessel_coords = np.argwhere(v == 1)
    d_map = np.zeros_like(v, dtype=float)

    # find coordinates of non-vessel pixels
    non_vessel_indices = np.argwhere(v == 0)

    for i, j in non_vessel_indices:
        # calculate euclidean distances to all vessel pixels
        dists = np.sqrt(np.sum((vessel_coords - np.array([i, j]))**2, axis=1))
        d_map[i, j] = np.min(dists)

    return d_map
#boh

def simulate_maldi_gp(v, param_vec):
    etasq = param_vec["etasq"]
    rho = param_vec["rho"]
    beta = param_vec["beta"]
    sigma_eps = param_vec["sigma_eps"]

    np_ = n * n
    x_vec = v.flatten(order='C')

    if etasq == 0:
        sim_y = np.random.normal(loc=0, scale=sigma_eps, size=np_)
        mmat = sim_y.reshape((n, n))
    else:
        xy = np.array([(i, j) for i in range(n) for j in range(n)])
        dfull = squareform(pdist(xy, 'euclidean'))

        k = etasq * np.exp(-0.5 * (dfull / rho)**2)
        np.fill_diagonal(k, np.diag(k) + sigma_eps**2)

        sim_gp = np.random.multivariate_normal(mean=np.zeros(np_), cov=k)
        sim_y = sim_gp + beta * x_vec
        mmat = sim_y.reshape((n, n), order='C')

    mmat = mmat - mmat.min()
    mmat = 5 * (mmat / mmat.max())
    return mmat
To prepare our simulated data for linear statistical analysis, we must convert the 2D spatial maps into 1D vectors. However, the method of flattening can significantly impact the preservation of spatial relationships. This section introduces the Hilbert curve, a type of space-filling curve that preserves locality better than standard row-major flattening. By traversing pixels in Hilbert order, we aim to maintain neighborhood relationships even after linearization.
The Hilbert curve operates recursively by subdividing the image into quadrants and visiting each pixel in a manner that minimizes the distance between sequential points. We the function
rot_hilbertfor coordinate rotation andxy2d_hilbertfor mapping (x, y) positions to a single Hilbert index. After computing the index for all pixel coordinates, we sort the grid accordingly to produce a consistent 1D traversal order for all images. This reordered index will be used later to compare how well Hilbert flattening retains spatial integrity compared to standard row-wise flattening.
Comparison of Row-Major vs Hilbert Curve flattening of vessel and MALDI images.
#python
def rot_hilbert(n_h, x, y, rx, ry):
    if ry == 0:
        if rx == 1:
            x = n_h - 1 - x
            y = n_h - 1 - y
        x, y = y, x
    return x, y

def xy2d_hilbert(n_h, x, y):
    d = 0
    t = n_h // 2
    xi, yi = x, y
    while t > 0:
        rx = int((xi & t) != 0)
        ry = int((yi & t) != 0)
        d += t * t * ((rx * 3) ^ ry)
        xi, yi = rot_hilbert(t, xi, yi, rx, ry)
        t //= 2
    return d

hilbert_coords = pd.DataFrame(
    [(x, y) for x in range(n) for y in range(n)],
    columns=['x', 'y']
)
hilbert_coords['d'] = hilbert_coords.apply(
    lambda row: xy2d_hilbert(grid_size, row['x'], row['y']),
    axis=1
)
hilbert_xy = hilbert_coords.sort_values('d').reset_index(drop=True)
This next step runs the core simulation loop that combines all previously defined elements: vessel masks, MALDI intensity maps, and flattening strategies. For each group and replicate, we generate a new vessel map, simulate a corresponding intensity map, and flatten the results using both the standard row-major order and the Hilbert curve order.
For each flattened representation, we extract the pixel indices corresponding to true vessel locations and to the top-intensity MALDI signal pixels (matching in number). These vectors are then used to compute a simple linear regression. The key idea is to assess how well the ordering of top MALDI signals aligns with the ordering of vessel locations. We compute the slope of the regression line and then calculate the error as |β̂ - 1|, where β̂ is the estimated slope.
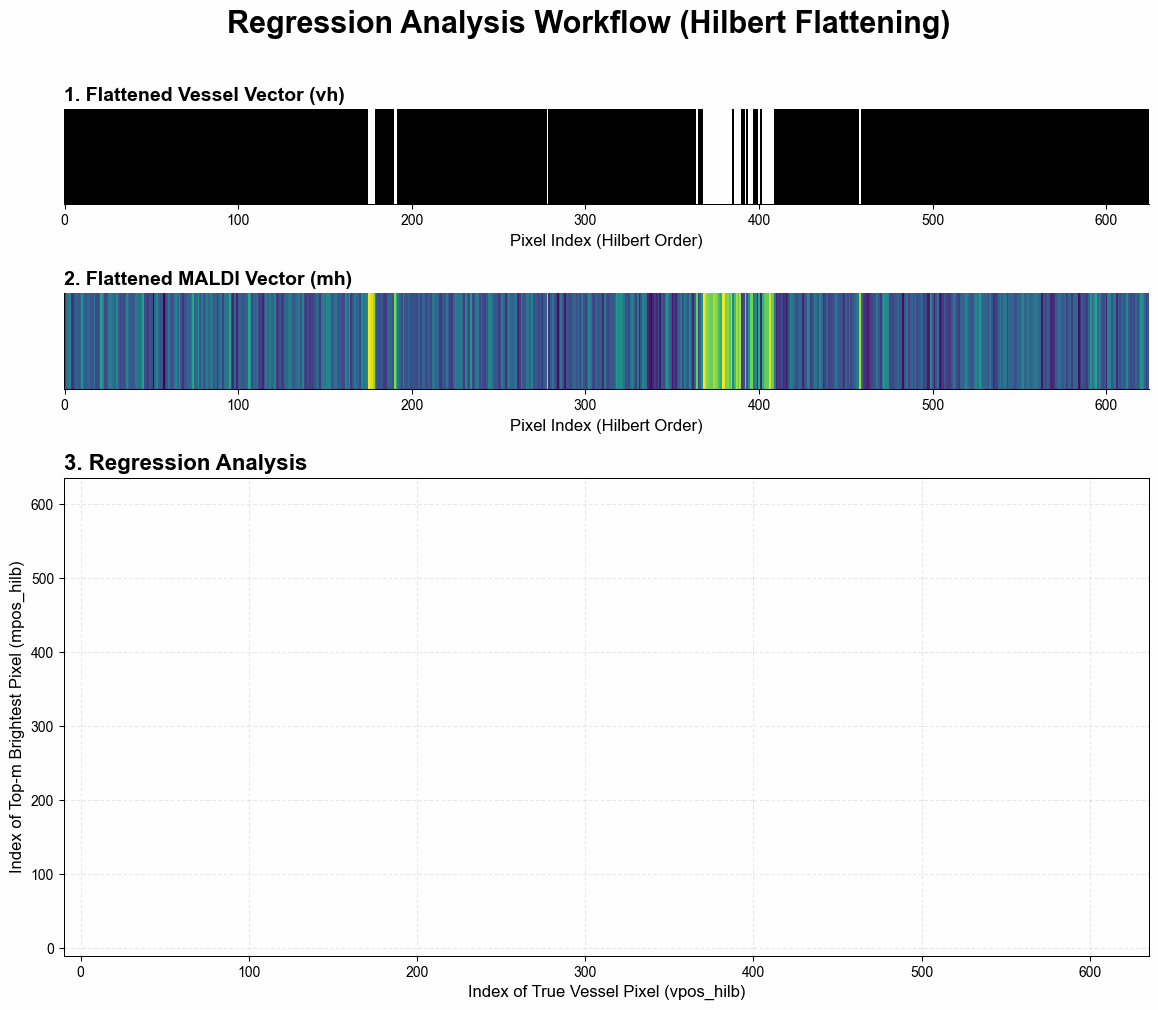
Hilbert-based regression workflow: from flattened vessel and MALDI vectors to slope estimation (β̂).
A slope close to 1 indicates a strong match between the location of the vessels and the intensity signal under that flattening strategy. We record the slope error for both flattening methods — vector and Hilbert — across all replicates. As a visual reference, the first replicate from each group is plotted to show both the vessel layout and the corresponding MALDI image.
#python
results_list = []

for grp in group_names:
    print(f"processing group: {grp}...")
    for r in range(1, num_images_per_group + 1):
        vmat = generate_random_vessel(n, min_circles, max_circles, min_radius, max_radius)
        param_vec = gp_params.loc[grp]
        mmat = simulate_maldi_gp(vmat, param_vec)

        m_count = int(np.sum(vmat))

        if m_count < 2:
            continue

        m_flat = mmat.flatten(order='C')
        v_flat = vmat.flatten(order='C')

        vpos_vec = np.sort(np.where(v_flat == 1)[0])
        topm_idx = np.argsort(m_flat)[-m_count:]
        mpos_vec = np.sort(topm_idx)

        try:
            slope_vec, _, _, _, _ = linregress(x=vpos_vec, y=mpos_vec)
            if np.isnan(slope_vec):
                slope_vec = 0
        except ValueError:
            slope_vec = 0

        err_vec = abs(slope_vec - 1)

        row_major_indices = (hilbert_xy['x'] * n + hilbert_xy['y']).to_numpy()
        vh = v_flat[row_major_indices]
        mh = m_flat[row_major_indices]

        vpos_hilb = np.sort(np.where(vh == 1)[0])
        topm_idx_h = np.argsort(mh)[-m_count:]
        mpos_hilb = np.sort(topm_idx_h)

        try:
            slope_hilb, _, _, _, _ = linregress(x=vpos_hilb, y=mpos_hilb)
            if np.isnan(slope_hilb):
                slope_hilb = 0
        except ValueError:
            slope_hilb = 0

        err_hilb = abs(slope_hilb - 1)

        results_list.append({
            "Group": grp,
            "Replicate": r,
            "Err_Vector": err_vec,
            "Err_Hilbert": err_hilb
        })

        if r == 1:
            fig, (ax1, ax2) = plt.subplots(1, 2, figsize=(8, 4))

            ax1.imshow(vmat, cmap=plt.cm.colors.ListedColormap(['white', 'black']), interpolation='nearest')
            ax1.set_title(f"{grp} – Vessel", fontweight='bold', fontsize=12)
            ax1.invert_yaxis()
            ax1.invert_xaxis()
            ax1.set_aspect('equal', 'box')
            ax1.axis('off')

            ax2.imshow(mmat, cmap='viridis', interpolation='nearest')
            ax2.set_title(f"{grp} – MALDI", fontweight='bold', fontsize=12)
            ax2.invert_xaxis()
            ax2.set_aspect('equal', 'box')
            ax2.axis('off')

            fig.tight_layout()
            plt.show()
After completing all simulation replicates across the five groups, we aggregate the recorded slope errors into a summary table. For each group, we compute both the mean and standard deviation of the slope error (|β̂ − 1|) for the two flattening methods — standard vector and Hilbert. The mean error indicates how closely, on average, the estimated slopes approach the ideal of 1. A smaller mean suggests that the flattening method better preserves the spatial relationship between vessel locations and MALDI intensity peaks. The standard deviation, meanwhile, reflects the consistency of the results across replicates — with lower values indicating greater robustness of the method. This summarized DataFrame provides a compact, interpretable overview of performance and sets the stage for visual comparison in the next step.
#python
df_methods = pd.DataFrame(results_list)
print("\nfull results dataframe:")
print(df_methods)

df_summary_err = df_methods.groupby('Group').agg(
    Mean_Err_Vector=('Err_Vector', 'mean'),
    Mean_Err_Hilbert=('Err_Hilbert', 'mean'),
    SD_Err_Vector=('Err_Vector', 'std'),
    SD_Err_Hilbert=('Err_Hilbert', 'std')
).reset_index()

df_summary_err['Group'] = pd.Categorical(df_summary_err['Group'], categories=group_names, ordered=True)
df_summary_err = df_summary_err.sort_values('Group')

print("\nsummary dataframe:")
print(df_summary_err)
To visually compare the performance of the two flattening strategies, we reshape the summary table into long format and plot the average slope error (|β̂ − 1|) across groups using a grouped barplot. Each bar represents the mean slope error for a specific method within one of the five spatial groups. Blue bars show results from standard row-major vectorization, while red bars represent Hilbert curve traversal. Lower bars indicate that the method more closely preserved the spatial alignment between vessels and intensity peaks.
This final visualization highlights which flattening strategy performs better as the spatial correlation strength increases. It provides an intuitive and compelling summary of the entire analysis pipeline, showing both accuracy and consistency across varying levels of spatial structure.
#python

# 8) plot: "distance from 1" (lower = closer to ideal)
# transform to long format for seaborn/matplotlib plotting
df_long_err = pd.melt(
    df_summary_err,
    id_vars=['Group'],
    value_vars=['Mean_Err_Vector', 'Mean_Err_Hilbert'],
    var_name='Method',
    value_name='Mean_Distance'
)

plt.figure(figsize=(10, 6))
ax = sns.barplot(
    data=df_long_err,
    x='Group',
    y='Mean_Distance',
    hue='Method',
    palette={'Mean_Err_Vector': 'blue', 'Mean_Err_Hilbert': 'red'}
)

# plot
ax.set_title("Mean of |β̂ – 1| by Group and Method", fontsize=14, fontweight='bold')
plt.suptitle("Distance from Ideal Slope (1)", fontsize=10, y=0.92)
ax.set_xlabel("Group")
ax.set_ylabel("Mean of |β̂ – 1|")
plt.xticks(rotation=45, ha='right')

handles, _ = ax.get_legend_handles_labels()
ax.legend(handles, ["Vector Flatten", "Hilbert Flatten"], title="Method")

plt.tight_layout(rect=[0, 0, 1, 0.95])
plt.show()
The take home message is that hilbert flattening consistently shows lower error, this suggests that spatial reordering via space-filling curves provides a more faithful 1D representation of 2D spatial information.
This has meaningful implications beyond simulated MALDI maps: in fields such as spatial transcriptomics, radiomics, and digital pathology, preserving spatial locality during data flattening can significantly impact the accuracy of downstream statistical models and machine learning classifiers. The insight gained here highlights the importance of choosing appropriate data representations when modeling spatially structured phenomena.